Our next project is to show our individual skills and interpretations through editing a dance video. We were all given rushes of two dancers that was shot a few weeks ago in the studio.
I am excited but a little nervous about this, as my strength is defiantly not editing.
Normally I'm used to being more Directing or Cinematography based, it gives me the creative control for the shots and the film to look a certain way. Viewing the process from just the editing side instead of filming for once was a really different take on what I'm used to within the job roles for a film.
Although different, I think this gave me a little taster of how truly difficult it is to edit a film with raw footage you have no idea about. I didn't really know what too expect when looking through the footage but I feel that there was plenty of material to compose something visually pleasing to watch.
RESEARCH:
Before running off and doing whatever I feel like with a project, I need to remember to research other styles of work to enhance my own ideas and outlooks. Inspiration is key when it comes to creating something beautiful, hence the research:
My first video (I've been obsessed with since it's release) is for a song that was in the charts recently, I remember first seeing on TV in a coffee shop in London, as soon as I saw the video it captivated me and kept me hooked. Now I'm not a girl who typically listens to chart music but the video of this song caught my attention and accompanied this song beautifully. Almost as if it cleansed the song and stripped it back to it's true meaning, a powerful message about mental health.
Sia - Chandelier


Salvation - Gabrielle Aplin
This video was another big inspiration for my edit, as it's probably my favourite dance video ever. It hasn't got that much choreography in it as my previous research, but the composition is so on point.
There is a similar theme of mental illness shown throughout this video along with a beautiful visual journey to accompany this.


I have watched this video so many times, and each time I pick up on different things that add to the raw emotion of it.
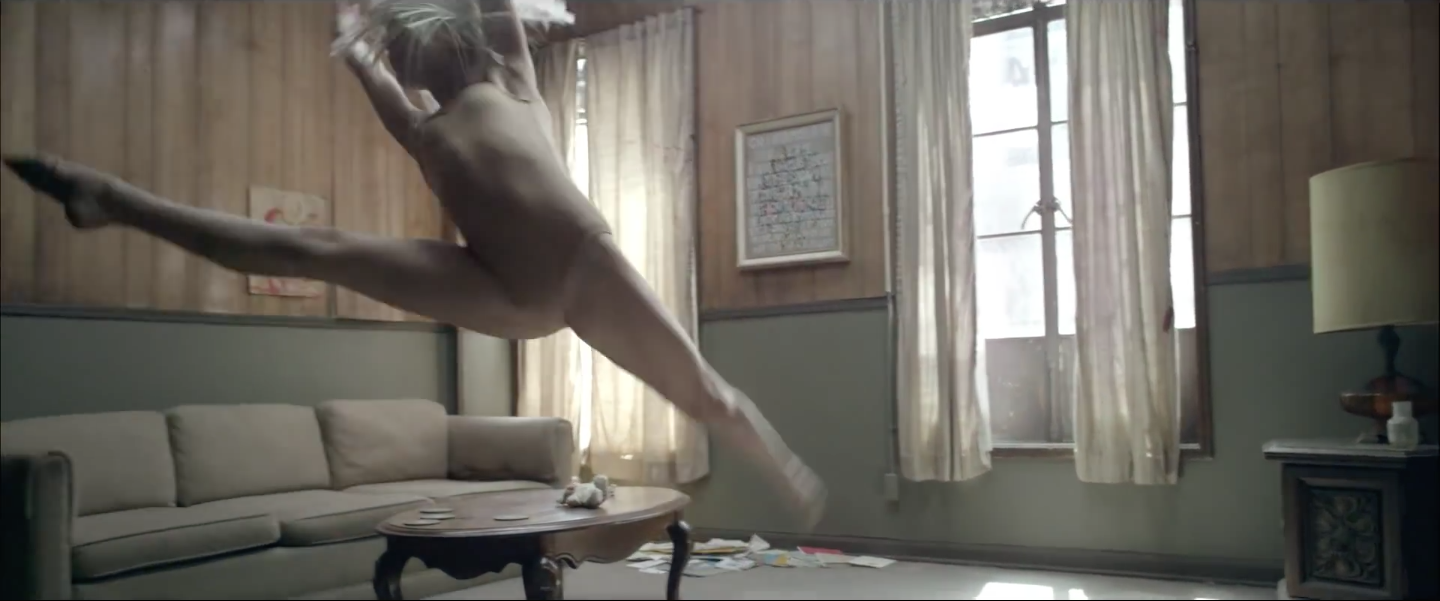
The music video for "Chandelier" was released on 6 May 2014. It features Maddie Ziegler, a young dancer. The video was directed by Sia and Daniel Askill, and was choreographed by Ryan Heffington. Ziegler shared her thoughts about the dance moves to New York magazine:
In the video, Ziegler wears a blonde Sia wig. Throughout the clip, Ziegler dances in a deserted apartment "while spinning, kicking, leaping, crawling, falling, twirling and hiding herself behind window drapes". An alternative one-take version of the clip was released in June 2014. Nolan Feenay from Time magazine commented that the dance moves in the "Chandelier" music video could be the best dance routine of 2014. "Chandelier" received nominations at the MTV Video Music Awards for Video of the Year and Best Choreography, and ultimately won the latter.
Salvation - Gabrielle Aplin
There is a similar theme of mental illness shown throughout this video along with a beautiful visual journey to accompany this.
I find this video refreshingly beautiful for the fact is doesn't follow a cliche storyline, it leaves room for the view to interpret their own meaning behind it and this really appeals to me when making a dance video, I'd like my audience to have the same reaction and for it to be a video that will be remembered.
EDITING:
For me, the editing process was tough. As I previously stated on my blog, editing isn't my strong point. I find it hard to put what I visualise in my head on screen, so this defiantly was a challenge.
I have found organisation is ever so important for a project like this. There was so much raw footage to sort through it felt like a never-ending task but eventually, I got there.
Looking at my previous research, the styles of editing are similar in ways. I love the atmosphere created and I wanted to use this in my own work.
I have been watching a lot of black and white films lately, which is what gave me the inspiration for the colour grading of my film. I feel that this works well within my piece and adds a sense of charm and character to it. I wanted my work to be different and go for a 'vintage feel'. I think I have achieved this and I am proud of the final product.

A still from Roman Holiday - Dance Scene
In premiere I created a simple edit I could add layers to and build upon, I think I work well like this and it gives me options to mess about and experiment with what I can achieve and what the best way to about it.
Colour Style: I decided to make my film entirely black and white. My decision to do this consisted of the footage and the way it was shot. Not to mention things just look lovely in black and white when there isn't much colour to a location. I find it brings out the subject more rather then their surroundings.
The footage taken by each group was shot in a completely different style, this broke all the rules when composing them together. I felt that in black and white, breaking continuity and degree rules weren't so noticeable as the background just merged into each frame.
For me, personally I feel that this draws your attention more to the subjects than what's going on around them, which was very intentional in my work.
As for my editing style, I originally played around with layering shots and adding effects to enhance each shot. After taking a break and watching it back, I realised that a routine like this needed to be more simple and gentle. I took all the effects back out and it felt so much more clean and neat.
Sometimes less is more, and for a routine like this I think adding too many effects will be such an overkill.
PROBLEMS: When editing, I encountered many unfortunate problems.
As I was working from home on an older version of Adobe Premiere Pro (CS5) I didn't have the same presets as the new version so I couldn't link my projects together on different machines.
MUSIC:
The music for this had to be just right. It took me quite a while to find a track I felt was suitable for my film, searching high and low on Royalty Free Music websites.

Eventually I found a website called Indie Music Box (http://indiemusicbox.com) where I found many music tracks that I loved the sound of.
I purchased a track called 'Old Photos' which is the track used in my film. I chose this because it had a melodic sound that suited the style and mood of the dancers.
In my film, I made a point of editing to the beat of the track. In dance videos, timing is very important. I think you can always tell when a soundtrack is just thrown over the top of something already edited and I deliberately didn't want to do this.
Overall, I feel I have learnt a lot from this project and gained many skills in order to progress in the future.
Organisation is never my strong point, but I'm doing better.
In previous projects I have failed to make back ups up my work, which has come in very handy for this one.
I have enjoyed editing this film and if there was something I could have done differently, I would have prepared my editing software and spent more time learning about the things that could potentially go wrong before making an edit.
